


How to Maintain Your Ceramic Coated Car

You’ve just spent X amount on having your pride and joy given the JP treatment and now you’ll want to know how to maintain its finish. I’ve split this topic into two sections, one being the products and tools which is covered in this blog post and the second is called ‘Dummies Guide to a Pro Car Wash’ which will be the next blog for you to read.

The most effective tool for cleaning a ceramic coated vehicle (or a none ceramic coated vehicle for that matter) in regards to removing as much of the dirt and grime from the surfaces prior to making any direct contact, is going to happen through the use of a pressure washer. By removing the larger dirt particles and grains of dirt prior to touching the paintwork, will reduce the chance of inflicting any swirl marks.
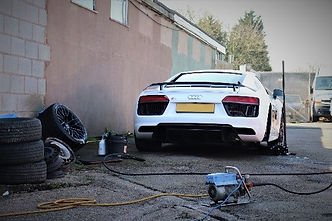
You can purchase a pressure washer for as little as £75, however, I would suggest upping your budget to a decent all-round machine. The Nilfisk E140 has served me very well for several years and it can be purchased for around £200. If you felt like stretching your budget to a Kranzle, you’ll be looking at prices starting from £650 for the K7 to £880 for the 1122 TST, which is a serious bit of kit.

I would highly recommend doing a bit of research before buying your main piece of kit and I’d probably suggest not to skimp out. If you get yourself a decent machine with a few attachments, you can then use it for doing other things around the house like cleaning the patio, driveway, fences, gutter cleaning and much more.

A snow foam attachment is an absolute must for any previously detailed vehicle. The pressure of the water itself is going to remove a decent amount of the dirt and the grime, however, you will need a ‘safe’ cleaning agent to help out. Get yourself a snow foam attachment to suit your specific pressure washer and these can be purchased from many online detailing stores.

You will then need to get yourself at least three buckets. One for the wheels and two for the bodywork. Each bucket should have grit guards inserted at the bottom and you can even get stickers to allocate each bucket. I use 2X 20L buckets for ‘Wash’ and ‘Rinse’ and then I have a single 15L bucket for the ‘Wheels’. (Never cross contaminate your wheel bucket with the bodywork buckets though.)

You’ll then need to get yourself some detailing brushes to be specifically used on the wheels only. A Swissvax wheel brush, EZ Detail Go brush, Martin Cox narrow brush and a tuff shine tyre brush are ideal. All of these can be purchased from Slims Detailing.

Next, we need some products so let’s cover the basics. Snow foam, shampoo, wheel cleaner, detail spray, tyre dressing, window cleaner, APC and a ceramic boost product would be the ideal. You could then think about broadening your products collection by adding a few extras like bug and insect remover, tar and glue remover, iron fallout remover and even a water spot remover.

In terms of which products, brushes and additional tools that you choose to buy is completely down to you. Just because your vehicle has been coated with Gtechniq ceramic coatings, doesn’t necessarily mean that you have to maintain it with Gtechniq products. I do personally like to use Gtechniq products with the Gtechniq ceramic coated vehicles, as the products are designed to work in harmony with each other.

A few good brands for you to look into would be; Meguiars, Auto Finesse and Swissvax, however, the choice really is yours. I would recommend Gtechniq, but others would basically do the same job but perhaps for a little cheaper.

If you now head over to the ‘Dummies Guide to a Pro Car Wash’ I will then explain the process of the hands on and practical stages to get you washing your car like a pro. (Aka me!)